Monday, November 28, 2022

Holiday Theme Week with Pretty Pink Posh


Hello and welcome to Day 1 of Holiday Theme Week at Pretty Pink Posh!

I'm sharing a set of gift tags, featuring products from the newest release, along with some older holiday products. 

**All items in the Christmas section are 15% off during theme week

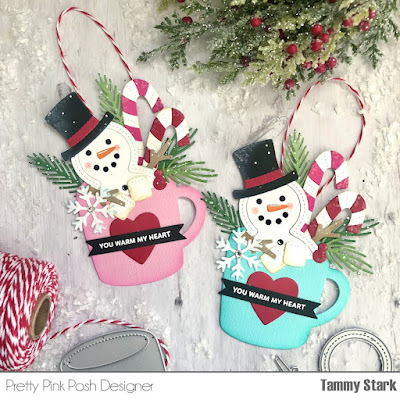
For my project, I created some Holiday Mug gift tags, made with all die cuts. If you're like me, you can never have enough gift tags for the holidays! These adorable tags are fun to make and they can also be displayed on the tree as a keepsake ornament!

These tags were created from dies and just required some inking and a bit of glitter. The mugs were die cut from aqua and pink cardstock using the Winter Mug Dies. I also die cut the candy canes, snowflakes, and marshmallows using these dies. I die cut and assembled the snowmen using the Snowman Shaker Die, then tucked them into the opening of the mug dies and attached it to the back with adhesive. I then added some glitter to the candy canes and tucked them into the mug, behind the snowman

I added some greenery and holly berries, die cut using the Winter Foliage Dies, splattering them with some white acrylic paint and adding a bit of glitter. The heart was die cut from red cardstock using the Valentine Hearts Coordinating Dies and attached to the center of the mugs. Next, I die cut a black sentiment strip using the banner die from the Holiday Envelopes Coordinating Dies, then white heat embossed the sentiment from the Holiday Sentiments Stamp Set.

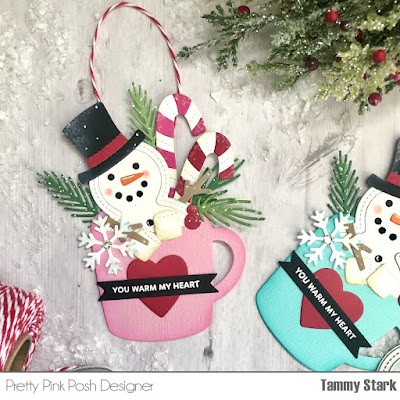
Lastly, I attached the snowflake from the Winter Mugs Die and to the tags and added a Sparkling Clear Jewel to the center for a bit of bling. To finish my tags, I taped some red and white bakers twine to the back of the tag, covering it with another die cut mug. This extra step isn't necessary, but really adds a clean and polished look to the tag!

Thanks so much for stopping by! I hope you are inspired to make some handmade tags for the holidays!

Hugs,
Tammy

Friday, November 25, 2022

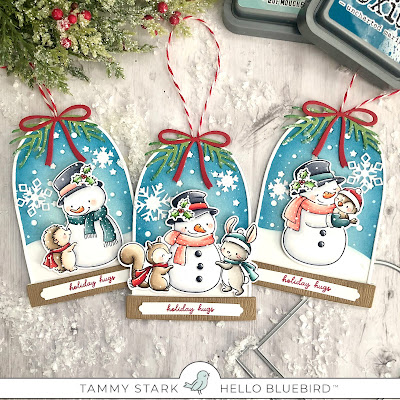
Snow Globe Tags with Hello Bluebird

Hello friends! I hope those who celebrate, had a wonderful Thanksgiving! Before I head off to do some Black Friday shopping, I have a fun post over on the Hello Bluebird blog. I created a set of snow globe gift tags, featuring the adorable Snowman Hugs stamp set.


Be sure to stop by the HB blog for all the details for these fun and festive tags!

Thanks for stopping by! Have great weekend!

Hugs,

Tammy


Tuesday, November 15, 2022

Merry & Bright with Hello Bluebird

Hello friends! I'm over on the Hello Bluebird blog sharing this fun winter themed card featuring the adorable set, Snowman Hugs, and a fun and whimsical custom sentiment!


Copic Colors:
Squirrel: E25, E23, E31, E50
Bunny: E44, E43, E42, E41, E0000
Red: R59, R35, R14
Green: YG17, YG13, YG03, YG01
Aqua: BG18, BG13, BG11, G000
Pink: RV55, RV53, RV00
Black: C7, C5, C3, C1

Be sure to stop by the HB blog for all the details and products used to create this card!

Thanks so much for stopping by!

Hugs!

Sunday, November 13, 2022

Lawn Fawn for Simon Says Stamp

Hello friends! I'm so excited to be on the Simon Says Stamp blog with a project highlighting some brand new Lawn Fawn products! I created a holiday/winter slimline card featuring some adorable snowmen, having some winter fun!


To begin, I die cut some Bristol smooth cardstock using the largest slimline die from the Large Slimline With Sliders Dies, then ink blended the background using Peacock Feathers and Tumbled Glass Distress Oxide inks. I then splattered some Peacock Feathers, thinned with water, and white acrylic paint onto the background to create a bit of interest. Next, I die cut a snowy hill from Bristol smooth cardstock using the Slimline Stitched Hillside Borders Dies. I lightly inked the edge of the snowy border with Tumbled Glass Distress Oxide ink, then attached to the background.


I die cut the snowmen and accessories using the Build-A-Snowman Dies and Woodland Critter Huggers Winter Add-On Dies. I die cut the snowmen and accessories using the following cardstock colors:

I added some depth to the die cuts using Copic Markers, then added white highlights using the Sakura White Gelly Roll Pen.


Next, I assembled the snowmen and arranged them onto the inked background. I added some Mini Snowflakes  die cut from Pixie Dust Sparkle Cardstock to add the perfect touch of shimmer. Lastly, I die cut Black Licorice cardstock using the Everyday Sentiment Banner Dies. I then embossed the sentiment from the Snow One Like You Stamp Set using White Embossing Powder and attached to the bottom of my card to complete my card!

Thanks so much for stopping by! I hope I inspired you to create something "SNOW" special with some new Lawn Fawn products at Simon Says Stamp!

Hugs,

Tammy

All the Spooks - Halloween Specialty Kit with Hello Bluebird

Hello friends! I'm sharing a fun project using the now sold out Halloween card kit from Hello Bluebird. If you were able to snag this a...