Monday, December 30, 2019

First Snow with Hello Bluebird

Hi crafty friends! Thanks for joining me today as I share my last card of the decade(hehe, I've been waiting to say that)! Today, I have another winter themed card, featuring First Snow from Hello Bluebird. I just absolutely adore all those sweet critters lined up, frolicking in the snow!


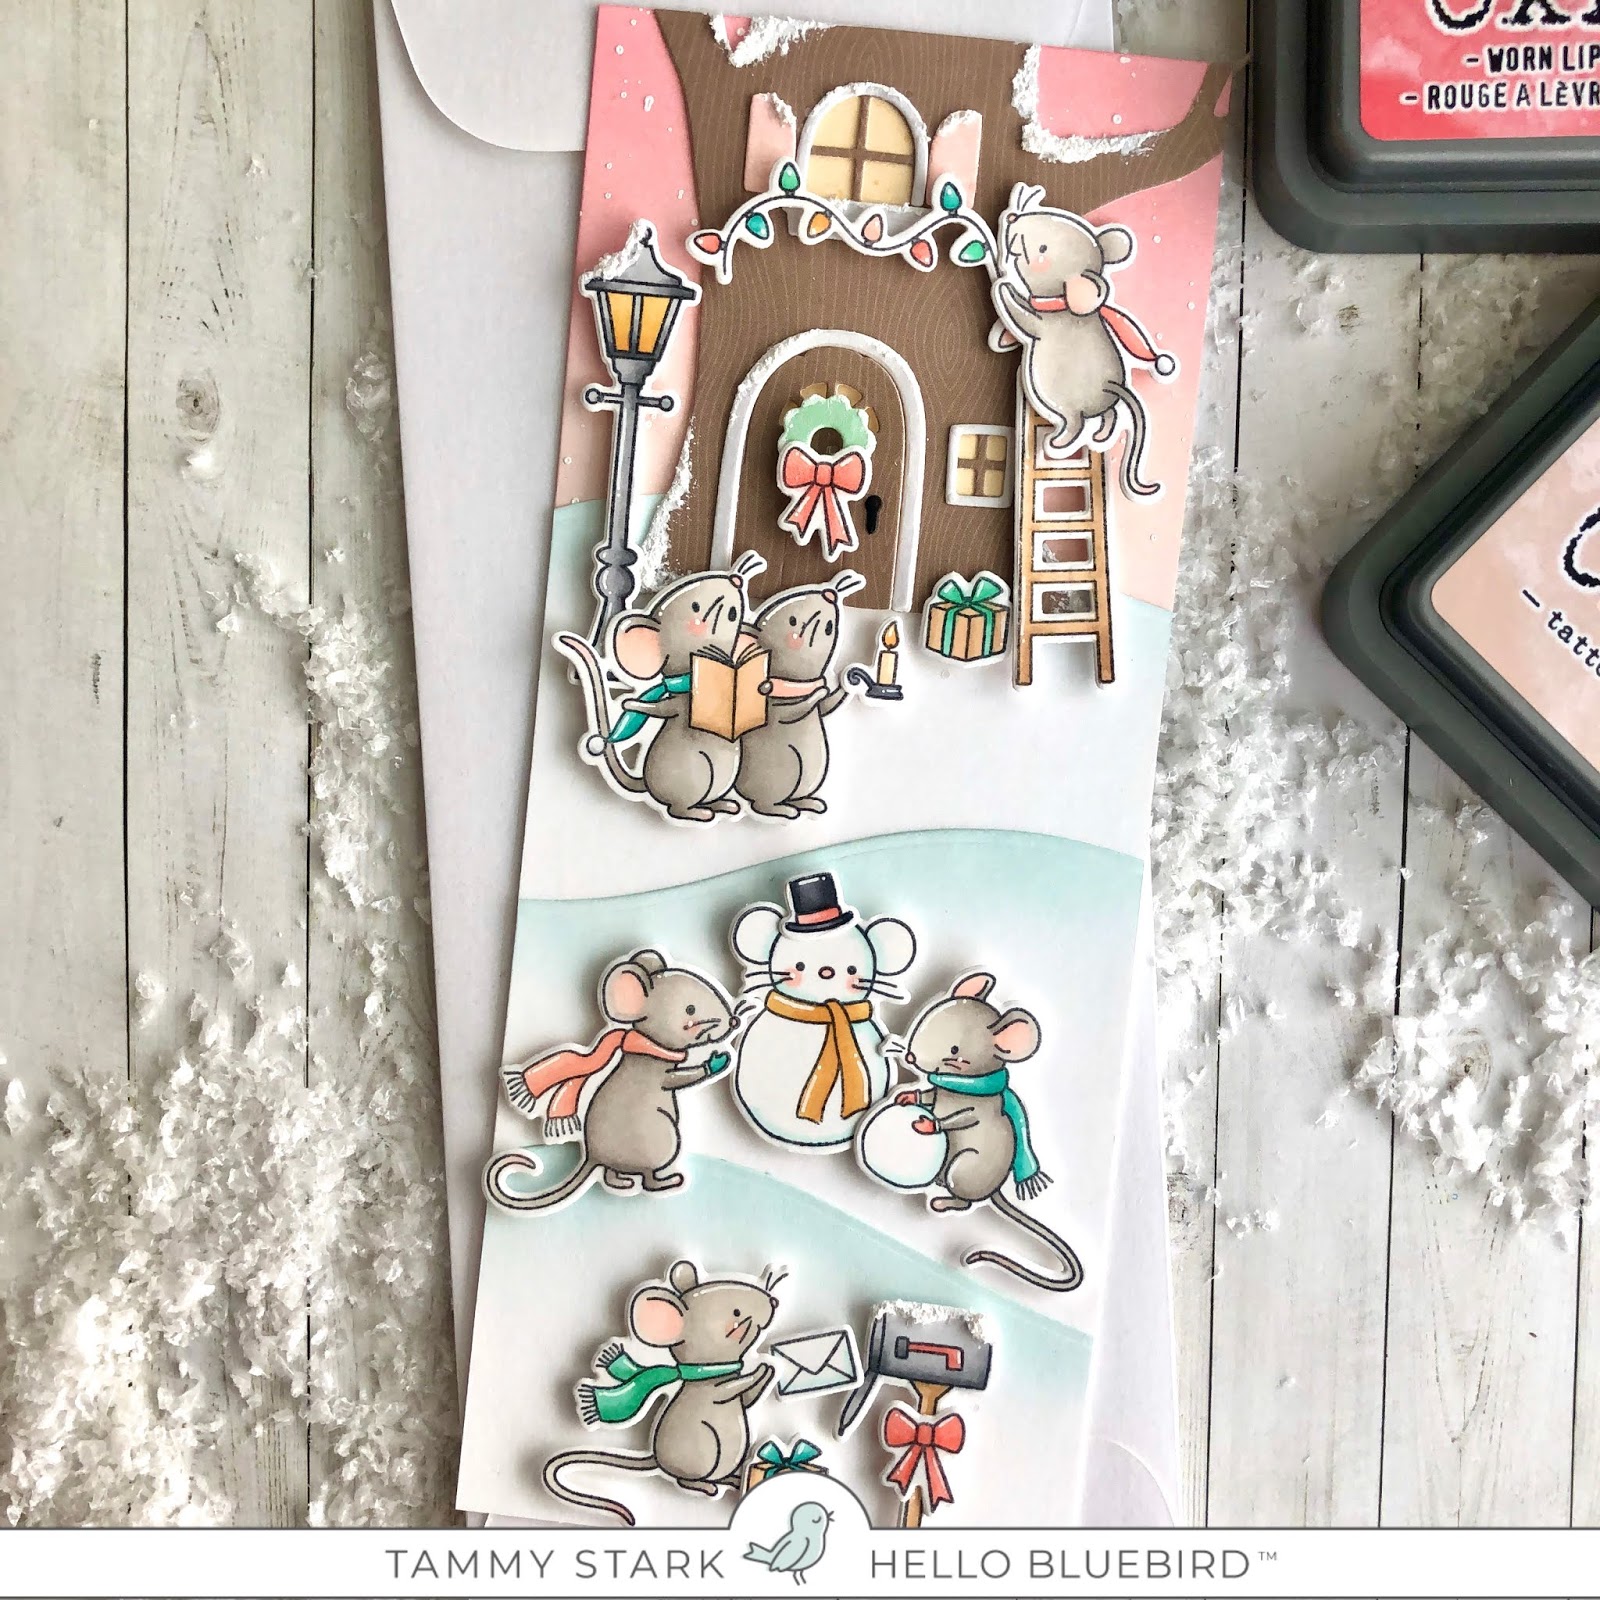
To make my slimline card, I first started by cutting a heavy weight piece of cardstock to 7 X 8 1/2" and scoring at 3 1/2" to create my card base.  Next, I die cut a piece of  snowflake patterned paper using this die and attached to my card base and set aside. From Bristol smooth cardstock, I cut a smaller rectangle and inked with Broken China and Tumbled Glass Distress oxide inks. Using a paintbrush, I splattered broken China DO ink watered down onto my panel, then did the same using white acrylic paint to create some texture and interest. Set aside to dry.


Next, I stamped all the sweet critters from the First Snow Stamp set onto Bristol smooth cardstock with black Momento Ink. All images were colored with Copic markers. I added highlights to my stamped images using a Sakura white Gelly Roll pen. I then cut out all of my colored images using the First Snow Die.


Next, I layered my inked panel onto the snowflake paper and adhered with tape runner.  Then, from white cardstock, I cut my snowy hill and inked the top with Tumbled Glass Distress Oxide and attached to the bottom of my inked panel. I arranged my snow critters onto my card, and attached all with foam tape for dimension. I tucked the deer behind the snowy hill, so he did not get dimensional tape.  Next, I cut a couple speech bubbles from white cardstock using the Photo Stack Die. I stamped a couple of sentiments from the First Snow stamp set onto the speech bubbles and attached to card.


To finish off my card, I cut some "snow" from white cardstock using the Snowy Sky Scene Die. Using a glue pen, I adhered a few of the round snow pieces onto my card to add a little texture and to create more of a snowy feel.

Thanks so much for stopping by today...Wishing you all a Happy and healthy New Year!!

XO,
Tammy


Thursday, December 26, 2019

Snow Play with Hello Bluebird


Hi Crafty friends! Today, I'm on the Hello Bluebird blog featuring this sweet Winter card. Head on over to see how I made this quick card!
https://blog.hellobluebird.com/?p=2879

Thanks for stopping by! See you soon...

XO,
Tammy

Thursday, December 5, 2019

Merry Mice with Hello Bluebird

Good morning, crafty friends! Is everyone ready for Christmas? Today, I have a sweet Holiday card for you using one of my favorite sets from Hello BluebirdMerry Mice, and the amazing stand alone Treehouse Scene Die and Holiday Add-On.


To create this slimline card, I started by cutting a piece of Bristol smooth cardstock to 3 1/2 X 8 1/2". I ink blended Tattered Rose and Worn Lipstick Distress Oxides onto top  1/3 of the card base, then splattered watered down white acrylic paint to create snow and set aside to dry. Next, I die cut the Treehouse from a wood grain cardstock I had in my stash, and all the other treehouse elements from various cardstock, and added Snow-Tex paste onto the treehouse and windows for a realistic snowy look. Once dried, I assembled the Treehouse and set aside. Next, I used the Hill and Dale Die and cut my snowy hills from white cardstock and trimmed down to 3 1/2" width. I inked the snowtops with Tumbled Glass Distress Oxide to add a bit of contrast.


Next, I stamped all images from the Merry Mice Stamp set onto Bristol smooth cardstock, and colored with Copic markers. I added white accents to my images using a white gel pen. I die cut all of my colored images using the coordinating Merry Mice Die

Now that everything is cut and colored, it's time to assemble the card! Cut a piece of heavy white cardstock to 7 X 8 1/2, score at 3 1/2, and fold to create your card base.  Next, attach your inked panel to the card base using a strong adhesive.  I attached my snowy hills onto my card, then the treehouse, trimming off any excess overhang. Then, I arranged the sweet mice to create little scenes throughout the card. Once I was happy with the arrangement, all images were attached using foam tape for dimension. 


Thanks for stopping by today...have a great day! 

Tammy XO


Puddle Jumpers with Sunny Studio

Hello friends! I'm over on the Sunny Studio blog   with a Spring inspired box card, featuring the adorable set, Puddle Jumpers. All the ...