Friday, December 24, 2021

Lacy Snowflakes with Sunny Studio

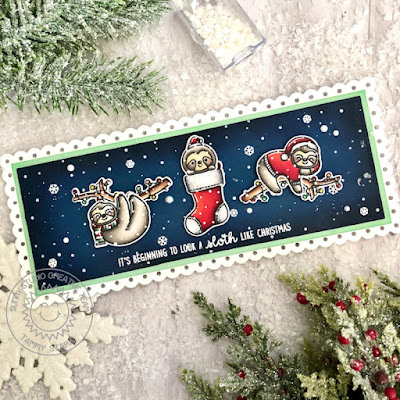
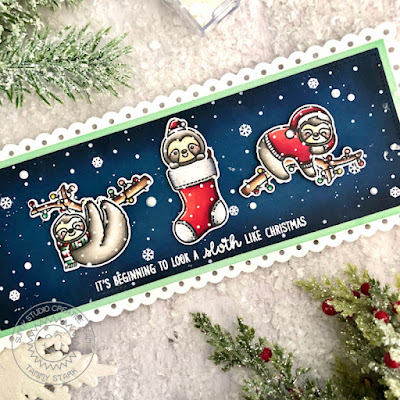
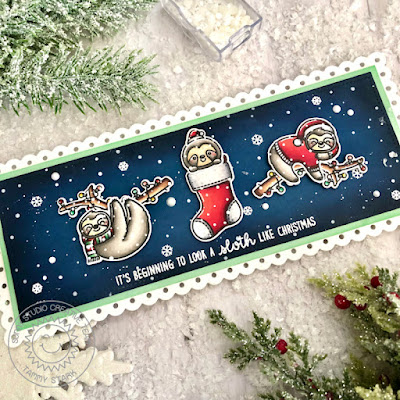
Hello friends and Merry Christmas Eve! Today, I'm over on the Sunny Studio blog sharing this fun holiday card featuring the Lacy Snowflake Dies,  with one of my all time favorite sets, Feeling Frosty


To begin, I cut Bristol smooth cardstock to 3 1/4 X 8 1/4" and ink blended the background with Worn Lipstick and Tattered Rose Distressed Oxide inks. I then splattered the background with thinned white acrylic ink to create a snowy look. Next, I cut a white snowy border using the Slimline Nature Borders Dies, lightly inking the edges with Tumbled Glass ink before adhering it to the background.

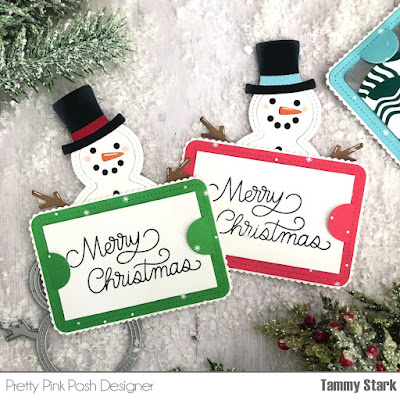
Next, I stamped the images from  Feeling Frosty, colored with Copic markers, and die cut with the Feeling Frosty Dies. I added some white dots to the snowmen using a stylus dipped in white acrylic paint to make it look like falling snow.


Next, I white heat embossed the large sentiment from Festive Greetings, centering it on my card. I then  arranged the die cut snowmen onto my card, attaching with foam tape for dimension. Lastly, I die cut white cardstock using the Lacy Snowflake Dies and glued them to the background, then attached the background to a 3 1/2 X 8 1/2" white card base to complete my card.

Thanks so much for stopping by! Wishing you all a wonderful holiday and a Happy New Year!!

Hugs,
Tammy


Friday, December 10, 2021

Lazy Christmas with Sunny Studio

Hello there! I'm over on the Sunny Studio blog sharing a card featuring the adorable set, Lazy Christmas. How adorable are those sloths lazily celebrating the holiday season? And that pun is just the best!!


To create this slimline card, I first began by stamping the images from Lazy Christmas and Christmas Critters. I colored them with Copic makers, added white gel pen highlights, and die cut with the coordinating Lazy Christmas Dies and Christmas Critters Dies

Next, I cut a white scalloped card base using the Slimline Scalloped Frame Dies. I then used the smaller slimline stitched mat to cut a piece of navy cardstock, ink blending the edges with Chipped Sapphire and Black Soot Distress Oxide inks. I splattered some white acrylic paint onto the background and white heat embossed snowflakes from Christmas Critters to create a snowy backdrop for the sloths.


I white heat embossed the sentiment from Lazy Christmas onto the bottom of the navy background, then matted it with green cardstock before attaching it to the white scalloped rectangle.

Lastly, I attached the die cut images to my card, using foam tape for dimension. I added a few Pure White Jewels to my card and attached my card front to a white slimline card base to complete my card.


Thanks so much for stopping by! I hope everyone has a wonderful and relaxing holiday!

Hugs,

Tammy


1 Stamp, 3 ways - Merry Mice

 Hello friends! It's time for another 1 Stamp, 3 Ways! This month, we're featuring the cuties from the adorable set, Merry Mice. Head on over to the Lawn Fawn blog to see how these were created and a complete supply list!


Thanks so much for stopping by! 

Big Hugs,

Tammy

Wednesday, December 1, 2021

Christmas Theme Week with Pretty Pink Posh


Hi friends! I'm excited to be joining in for ChristmasTheme Week over at Pretty Pink Posh!  I have a fun project to share, using the new Snowman Shaker Die!

**All items in the Christmas section are 15% during theme week!

For my project, I created some snowman gift card holders. If you're like me, you can never have enough gift card holders for the holidays! These adorable GC holders are so quick and easy to mass produce so you can make a bunch to hand out!

To begin, I cut 3 snowmen using the Snowman Shaker Die from various colored cardstock and assembled. Next, I cut the gift card holders using the Stitched Gift Card Holders Dies. I first cut the white scalloped pieces, then attached the patterned paper pieces die cut with the other die included in the set. 


 Next, I attached the snowmen to the back of the gift card holders, then covered up the back with another white scalloped piece to cover the snowman and give the back a finished look.


To finish up my gift card holders, I cut a piece of white cardstock the same size as a gift card and stamped a sentiment in black ink from the Holiday Scripts Stamp Set. Lastly, just slide your gift card into the slots and you are done! When the recipient removes the gift card, there is a nice stamped card that you can customize or write a message on! These fit into a standard A2 envelope, or you can punch a hole at the top and attach to a gift!

Thanks so much for stopping by! I hope you're inspired to make some quick and simple gift card holders for the holidays!

Hugs, 

Tammy


Puddle Jumpers with Sunny Studio

Hello friends! I'm over on the Sunny Studio blog   with a Spring inspired box card, featuring the adorable set, Puddle Jumpers. All the ...