Monday, February 28, 2022

Garden Birthday Party with Hello Bluebird

Hello friends! I'm over on the Hello Bluebird blog  with this Tweet Birthday card, featuring the critters from Garden Party and the balloons from Balloon Buddies. Head on over to the HB blog for all the details and a complete supply list! 


Thanks so much for stopping by!

Big hugs,

Tammy

Thursday, February 10, 2022

Pretty Pink Posh - 8th Birthday Blog Hop

Hello friends! I'm so excited to be joining in on the 3 day blog hop to celebrate the Pretty Pink Posh's 8th Birthday and new release! WOW! The brand new birthday release is available now and it is full of amazing products I know you will love! 


If you're following along with the blog hop, you should have arrived here from Nichol Spohr's blog.  Make sure to read to the bottom of my post for info on the AMAZING giveaway and links to today's blog hop participants!


I created a couple of fun birthday projects using a combination of brand new products combined with some older birthday products. I just love how seamlessly all the sets work together! 


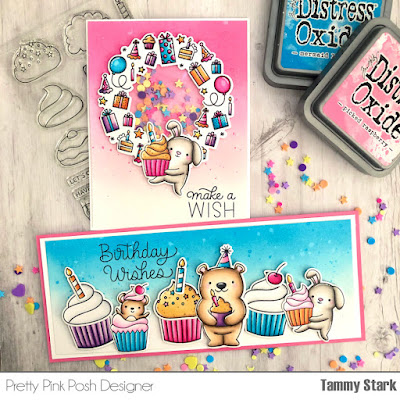
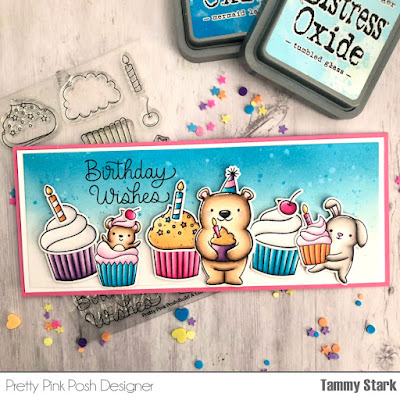
For my first card, I created a slimline card, featuring the new Build A Cupcake stamp set. Combined with the Cupcake Critters stamp set, it makes for such a fun and festive scene!

To begin, I cut a piece of Bristol smooth cardstock to 3 X 8" and ink blended it with Mermaid Lagoon and Tumbled Glass Distress Oxide inks. I splattered the background with some water and thinned Mermaid Lagoon ink for interest. Once dry, I attached the inked background to a white mat, measuring 3 1/4 X 8 1/2", and then onto a bright pink 3 1/2 X 8 1/2" card base. Next, I stamped the images from the Build A Cupcake stamp set and Cupcake Critters stamp set and colored them with Copic markers, adding highlights with a white gel pen. I then die cut the images using the Build A Cupcake Coordinating Dies and Cupcake Critters Coordinating Dies. Lastly, I stamped the sentiment onto the background with black ink and attached the stamped images using foam tape for dimension.


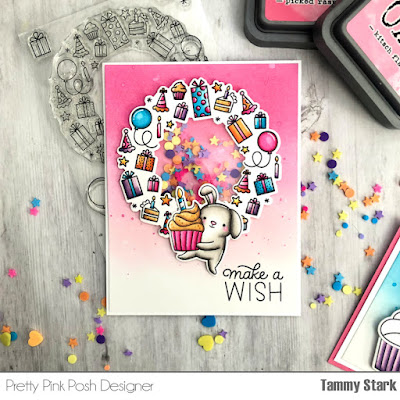
My next card features a fun shaker inside the new Birthday Wreath Stamp Set. To begin, I cut a piece of Bristol cardstock, measuring 4 X 5 1/4" and ink blended it with Picked Raspberry, Kitsch Flamingo, and Spun Sugar Distress Oxide inks. I then splattered some water then some thinned out Picked Raspberry ink onto the background. Next, I stamped the wreath from the Birthday Wreath Stamp Set, colored it with Copic markers, and die cut with the Birthday Wreath Coordinating Dies. I then attached a piece of acetate to the back of the wreath to cover up the opening. I sprinkled some of the Pinata Party Clay Confetti onto the card, then attached the wreath using a couple of layers of foam tape to allow for the confetti to move around. I added the adorable bunny from the Cupcake Critters stamp set then stamped the sentiment from the Birthday Wreath stamp set in black ink. To finish my card, I attached the inked card front to a white A2 card base.

GIVEAWAY

There are 2  $50 gift certificates up for grabs (one winner each day). Winners will be picked randomly along the blog hop. Comments must be left by 11:59 PM PST on 2/16/2022. Winners will be announced on the PPP blog.


Here's a list of all the designer's participating in today's blog hop:

Tammy Stark >>> YOU are HERE!!

Thanks so much for stopping by! Be sure to hop along and leave a comment for a chance to win the giveaway! Happy Hopping!!

Hugs,
Tammy

Saturday, January 29, 2022

Valentine Theme Week with Pretty Pink Posh


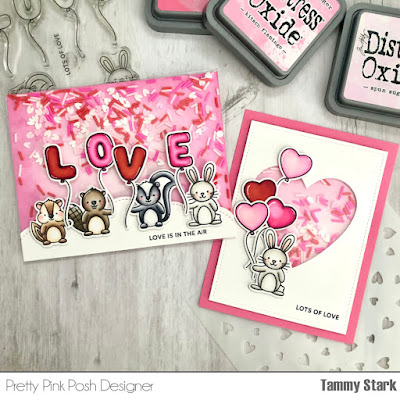
 Hi friends! I'm excited to be joining in for Valentine Theme Week over at Pretty Pink Posh!  Love is in the air, and I have a couple of fun projects to share, using products from the new Valentine release.

**All items in the Valentine section are 15% during theme week!


To begin, I stamped the images from the Love Balloons stamp set, colored with Copic markers, and die cut with the coordinating dies.

Copic Colors Used:
Red: R46, R17, R05
Pinks: RV17, RV06, RV04, RV02, RV00
Squirrel: E25, E23, E31, E51, E50
Beaver: E47, E44, E43, E42, E40, E51, E50
Skunk: C7, C5, C3, C1, C00
Bunny: W4, W2, W1, W0, W00


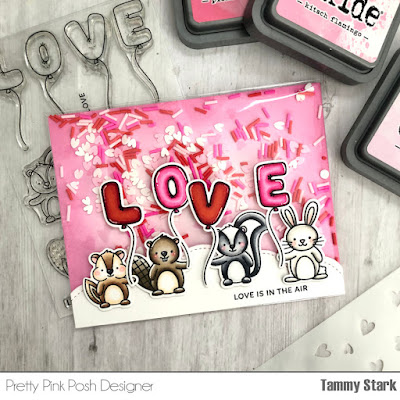
For my first card, I created an infinity shaker card. To begin, I cut an A2 piece of Bristol smooth cardstock and lightly ink blended it with Picked Raspberry, Kitsch Flamingo, and Spun Sugar Distress Oxide inks. I then placed the Scattered Hearts Stencil over my inked background and blended Picked Raspberry and Kitsch Flamingo to create a subtle heart background. I then put the inked background into an A2 cello bag and filled it with Pink Hearts Clay Confetti, White Hearts Clay Confetti, and Be Mine Clay Confetti, then sealed it up. 

Next, I die cut a white cloud border using the Stitched Borders 2 Dies, trimmed it to fit, stamped my sentiment, and attached it to the front of my shaker. Lastly, I arranged the colored images onto my card and attached them using foam tape, then attached the shaker to a white A2 card case using strong adhesive.


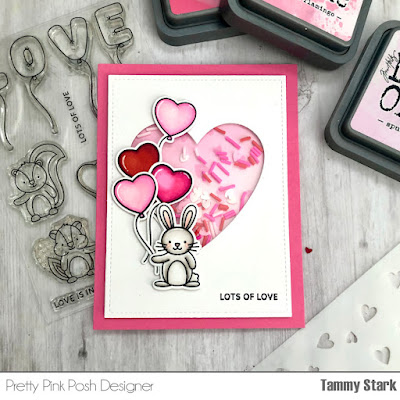
For my next card, I created a simple heart shaker card using the adorable images from the Love Balloons stamp set. I started by cutting an A2 card base using hot pink cardstock. Next, I cut a smaller white rectangle, then cut a heart opening using the All My Love Coordinating Dies. I inked a panel of Bristol cardstock using Kitsch Flamingo and Spun Sugar Distress Oxide inks, and then lightly stenciled some hearts with Kitsch Flamingo using the Scattered Hearts Stencil. I attached a piece of acetate to cover the heart opening and lined the back of the panel with foam tape. I sprinkled Pink Hearts Clay Confetti, White Hearts Clay Confetti, and Be Mine Clay Confetti onto the inked background and attached the white panel to the hot pink cardstock to create the shaker.

Lastly, I attached the stamped images to my card using foam tape for dimension and stamped the sentiment in black ink to complete my card.

Thanks so much for stopping by! I hope I inspired you to create something fun for Valentine's Day!!

Big hugs,

Tammy

Friday, January 28, 2022

Valentine Flying High with Hello Bluebird

Hi friends! I'm over on the Hello Bluebird blog  sharing this fun Valentine's themed card, featuring one of my favorites, Flying High. For all the details and links to items used, head on over to the blog!


Thanks for stopping by! Happy Crafting!

Hugs,

Tammy

Tuesday, January 11, 2022

Pretty Pink Posh January 2022 Release Blog Hop

Hello friends! I'm so excited to be joining in on the blog hop to celebrate the Pretty Pink Posh January 2022 release! The brand new Valentine release is available now and it is amazing! 


If you're following along with the blog hop, you should have arrived here from the Pretty Pink Posh blog. Make sure to read to the bottom of my post for info on the giveaway and links to today's blog hop participants!


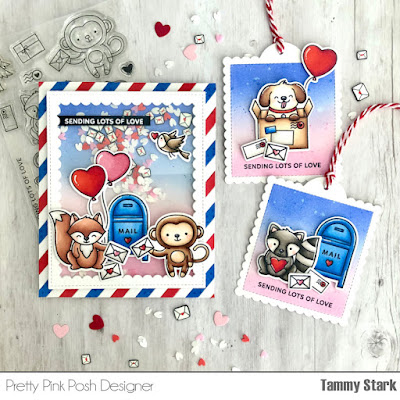
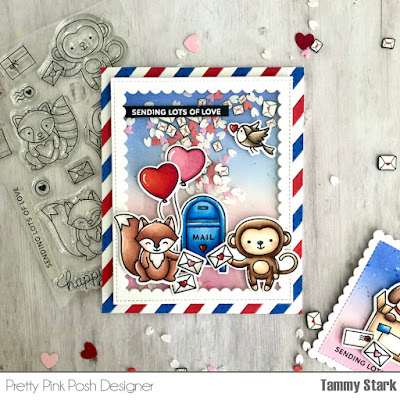
For my project, I created a fun shaker card and coordinating gift tags using the new Sending Love stamp set. This set is one of my favorites from the new release; it's just too adorable! 


To begin, I stamped images from  Sending Love, colored with Copic markers, and die cut with the Sending Love Coordinating Dies. Next, I cut an A2 piece of white cardstock and created an Air Mail border by alternating red, white, and blue strips of cardstock cut using the Simple Strips Dies. 

I then created the shaker by cutting 5 Scallop Frames from white cardstock. I stacked, then glued, 4 frames together and attached to my inked background (Blueprint Sketch, Tumbled Glass, Spun Sugar, and Kitsch Flamingo Distress Oxide inks). Next, I generously sprinkled the new Love Letters Clay Confetti onto the background and sealed it up with another Scallop Frame backed with acetate. I attached the rectangle shaker to the striped background and added the stamped images onto the front, attaching some with foam tape for dimension. Lastly, I white heat embossed the sentiment onto a black cardstock strip and attached it to my card front to complete it!


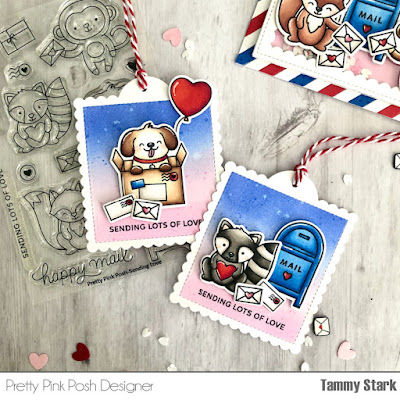
Since I had to use all of the adorable critters from the Sending Love stamp set, I also created a couple of coordinating tags.

I started by die cutting Bristol smooth cardstock using the Scallop Square Tags Dies. i masked off the edges and ink blended the background using Blueprint Sketch, Kitsch Flamingo, and Spun Sugar Distress Oxide inks. I then splattered some water onto the background and some watered down ink to give it some interest. Next, I added the colored images from the Sending Love stamp set, attaching them with foam tape. The balloon was stamped from the Love Balloons stamp set and die cut using the Coordinating Dies. To finish my tags, I stamped the sentiment along the bottom with black ink and threaded some red and white bakers twine.

GIVEAWAY

There are 2 $25 gift certificates up for grabs (one winner each day). Winners will be picked randomly along the blog hop. Comments must be left by 11:59 PM PST on 1/16/2022. Winners will be announced on the PPP blog.


Here's a list of all the designer's participating in today's blog hop:

Tammy Stark >>>> You are HERE

Thanks so much for stopping by! Happy Hopping!!


Friday, December 24, 2021

Lacy Snowflakes with Sunny Studio

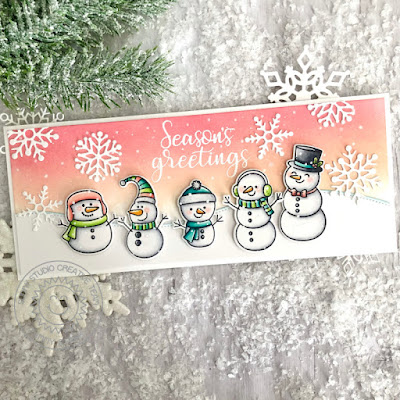
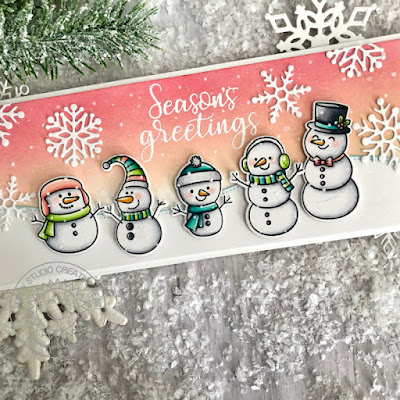
Hello friends and Merry Christmas Eve! Today, I'm over on the Sunny Studio blog sharing this fun holiday card featuring the Lacy Snowflake Dies,  with one of my all time favorite sets, Feeling Frosty, 


To begin, I cut Bristol smooth cardstock to 3 1/4 X 8 1/4" and ink blended the background with Worn Lipstick and Tattered Rose Distressed Oxide inks. I then splattered the background with thinned white acrylic ink to create a snowy look. Next, I cut a white snowy border using the Slimline Nature Borders Dies, lightly inking the edges with Tumbled Glass ink before adhering it to the background.

Next, I stamped the images from  Feeling Frosty, colored with Copic markers, and die cut with the Feeling Frosty Dies. I added some white dots to the snowmen using a stylus dipped in white acrylic paint to make it look like falling snow.


Next, I white heat embossed the large sentiment from Festive Greetings, centering it on my card. I then  arranged the die cut snowmen onto my card, attaching with foam tape for dimension. Lastly, I die cut white cardstock using the Lacy Snowflake Dies and glued them to the background, then attached the background to a 3 1/2 X 8 1/2" white card base to complete my card.

Thanks so much for stopping by! Wishing you all a wonderful holiday and a Happy New Year!!

Hugs,
Tammy


Friday, December 10, 2021

Lazy Christmas with Sunny Studio

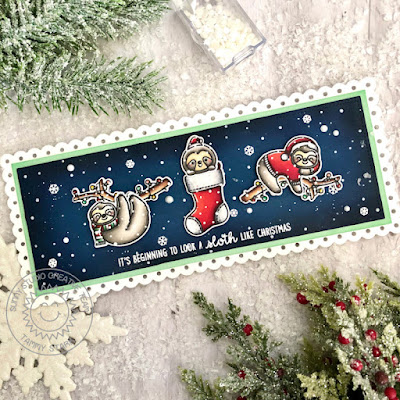
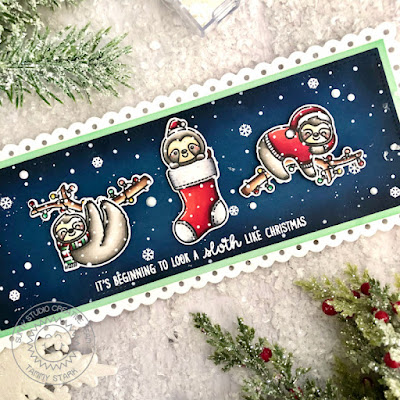
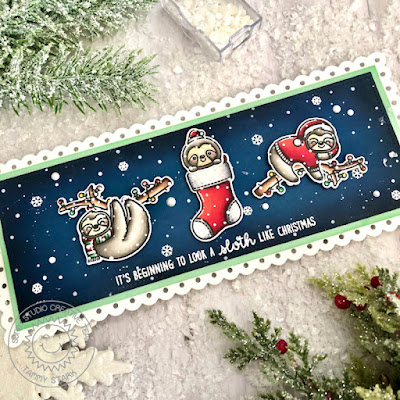
Hello there! I'm over on the Sunny Studio blog sharing a card featuring the adorable set, Lazy Christmas. How adorable are those sloths lazily celebrating the holiday season? And that pun is just the best!!


To create this slimline card, I first began by stamping the images from Lazy Christmas and Christmas Critters. I colored them with Copic makers, added white gel pen highlights, and die cut with the coordinating Lazy Christmas Dies and Christmas Critters Dies. 

Next, I cut a white scalloped card base using the Slimline Scalloped Frame Dies. I then used the smaller slimline stitched mat to cut a piece of navy cardstock, ink blending the edges with Chipped Sapphire and Black Soot Distress Oxide inks. I splattered some white acrylic paint onto the background and white heat embossed snowflakes from Christmas Critters to create a snowy backdrop for the sloths.


I white heat embossed the sentiment from Lazy Christmas onto the bottom of the navy background, then matted it with green cardstock before attaching it to the white scalloped rectangle.

Lastly, I attached the die cut images to my card, using foam tape for dimension. I added a few Pure White Jewels to my card and attached my card front to a white slimline card base to complete my card.


Thanks so much for stopping by! I hope everyone has a wonderful and relaxing holiday!

Hugs,

Tammy


Sweet as Can Bee with Sunny Studio

Hello friends! Tammy here with a fun project featuring the adorable set, Sweet as Can Bee.   I decided to create a cute tea pocket and musl...